Step by Step Windows Upgrade: Your 2026 Guide
TL;DR:
- Ensuring hardware compatibility and backing up data are critical steps before upgrading to Windows 11.
- Choose the appropriate upgrade method—Windows Update, Installation Assistant, or ISO—based on your needs and system support.
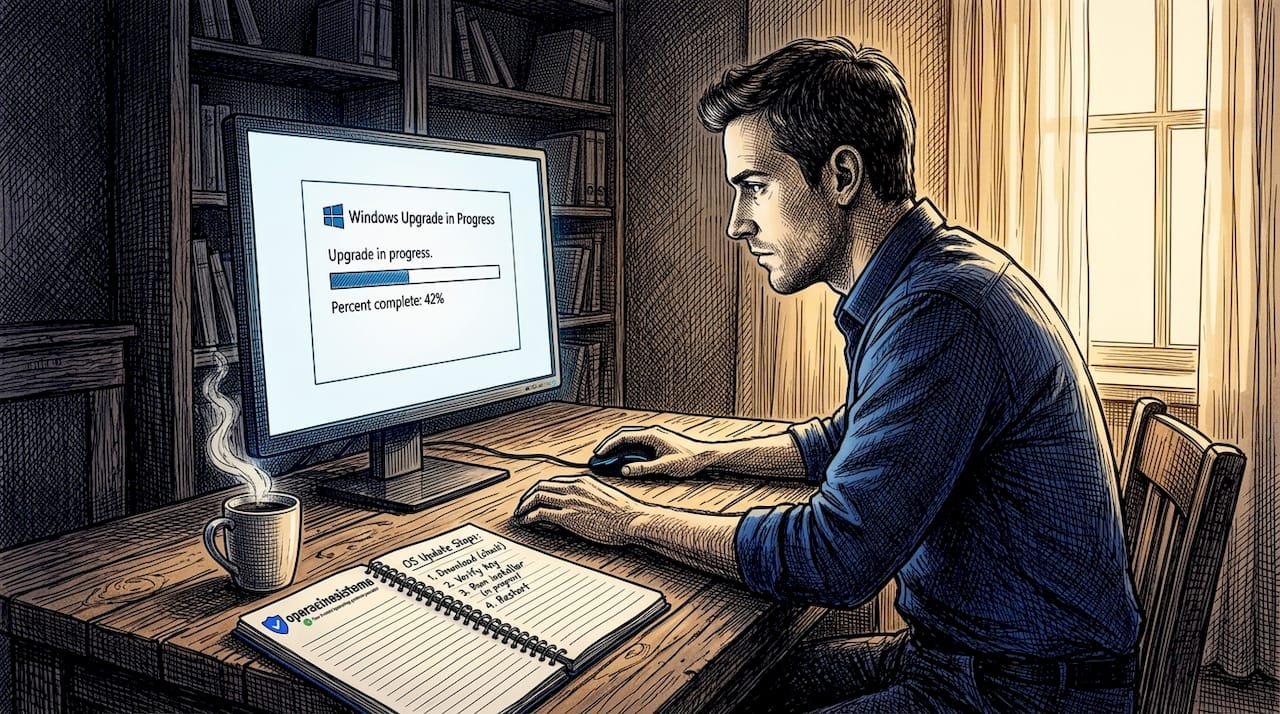
A step by step Windows upgrade is the process of moving from an older Windows version to a newer one while keeping your files, apps, and settings intact. This guide covers every phase of the Windows upgrade process: compatibility checks, preparation, three proven upgrade methods, and post-upgrade finalization. Whether you use Windows Update, the Installation Assistant, or installation media, each approach follows the same core logic. You need a genuine, activated license, compatible hardware, and a clear plan before you start. Get those three things right, and the upgrade goes smoothly.
What are the Windows 11 minimum hardware requirements?
Windows 11 has stricter hardware requirements than any previous version, and skipping the compatibility check is the single most common reason upgrades fail before they start.
The minimum requirements are:
- Processor: 1 GHz or faster with 2 or more cores on a compatible 64-bit CPU
- RAM: 4 GB minimum
- Storage: 64 GB minimum free space
- TPM: Trusted Platform Module (TPM) version 2.0, enabled in firmware
- Secure Boot: Must be supported and enabled in UEFI firmware
- Display: 720p resolution or higher, 9-inch or larger screen
- Internet: Required for initial setup on Windows 11 Home
TPM 2.0 and Secure Boot are the two blockers that catch most users off guard. Both are firmware settings, not hardware you buy separately. You enable them inside your BIOS or UEFI settings, usually under the Security tab.
The fastest way to check all of this at once is Microsoft’s PC Health Check tool. Download it directly from Microsoft, run it, and it tells you exactly which requirements your system passes or fails. PC Health Check identifies TPM and processor incompatibilities before you waste time downloading a multi-gigabyte upgrade file. That early warning is worth the two minutes it takes.
Your current Windows 10 installation also needs to be version 2004 or later. Check this by pressing Win + R, typing "winver`, and pressing Enter. If you are on an older build, run Windows Update first to get current before attempting the upgrade.
전문가 팁: Check your activation status before anything else. Go to Settings > System > Activation. If your copy of Windows 10 is not genuinely activated, Windows 11 will not activate either after the upgrade. Fix the license issue first.
Typical compatibility blockers beyond TPM and Secure Boot include older Intel Core 6th and 7th generation processors, which Microsoft officially excludes from the supported CPU list. Some users work around this with registry edits, but that approach carries risk and voids support. If your hardware is genuinely incompatible, a new license on new hardware is the cleaner path.
What preparation steps should you take before upgrading?
Preparation is where most upgrade problems are actually prevented. Skipping this phase is how people end up losing files or spending hours recovering a broken system.
Here is what to do before you run a single installer:
- Back up personal files to an external drive or cloud storage like OneDrive or Google Drive. Do not rely on the upgrade preserving everything. Backups are your safety net.
- Create a system image using Windows Backup or a third-party tool like Macrium Reflect Free. This lets you roll back the entire system if something goes wrong.
- Close all open applications before starting the upgrade. Background apps can lock files the installer needs to replace.
- Plug in your power adapter if you are on a laptop. An upgrade that loses power mid-process can corrupt the system partition.
- Connect via wired Ethernet if possible. Wired connections and Delivery Optimization settings improve download speeds significantly compared to Wi-Fi, which matters when you are pulling down a 5+ GB upgrade file.
- Verify your Windows license is genuine and activated. An unactivated system will carry that problem into Windows 11.
For IT professionals managing multiple machines, the Microsoft 365 migration guide covers data preservation and downtime planning practices that apply directly to OS upgrade scenarios as well.
전문가 팁: Go to Settings > Windows Update > Advanced Options and set Active Hours to match your work schedule. This prevents Windows from scheduling a restart during a critical moment in the upgrade process.
One preparation mistake that causes real damage: running disk cleanup or defragmentation immediately before an upgrade. Disk cleanup can delete recovery files the installer references. Defragmentation on an SSD is unnecessary and adds wear. Leave the drive as-is and let the installer do its work.
How to perform the Windows upgrade: three methods explained
Windows 11 upgrades are available through Windows Update, the Installation Assistant, or installation media. Each method suits a different situation. Here is how each one works.
Method 1: Windows Update (simplest)
This is the right starting point for most users. Windows Update handles everything automatically.
- 열기 Settings > Windows Update
- 클릭 Check for updates
- If Windows 11 is available for your device, you will see a feature update offer
- 클릭 Download and install
- Let the download complete. Windows Update coordinates restarts with other pending updates to reduce interruptions
- When prompted, click Restart now or schedule the restart for a convenient time
- Your PC will restart multiple times. This is normal. Do not power off
If Windows 11 does not appear as an available update, your device may not yet be offered the upgrade through this channel. Move to Method 2.
Method 2: Windows 11 Installation Assistant
The Installation Assistant forces the upgrade even when Windows Update has not offered it yet.
- Download the Windows 11 설치 도우미 from Microsoft’s official website
- Run the downloaded file as Administrator
- Accept the license terms
- 클릭 Accept and install
- The tool downloads Windows 11, verifies the files, and begins installation
- Your PC will restart several times during the process
- After the final restart, Windows 11 setup completes and you land on your desktop
This method is ideal for users who want Windows 11 now rather than waiting for the rollout to reach their device.
Method 3: Installation media or ISO (most control)
This method gives you the most control and is the preferred approach for IT professionals. The key rule: launch setup.exe from within running Windows rather than booting from the USB. Booting from USB triggers a clean install, which wipes your data.
- Download the 미디어 제작 도구 from Microsoft’s official website
- Run the tool and choose Create installation media for another PC or download an ISO
- Mount the ISO by double-clicking it, or insert the USB drive
- 열기 파일 탐색기, navigate to the mounted drive, and double-click setup.exe
- 클릭 다음 and accept the license terms
- Choose your upgrade option when prompted
| Upgrade option | What it keeps | 최상의 대상 |
|---|---|---|
| Keep personal files and apps | Files, settings, and installed apps | Most users upgrading from Windows 10 |
| Keep personal files only | Files and settings, removes apps | Users with app conflicts |
| Nothing | Clean install | Fresh start, no data to preserve |
- 클릭 Install and let the process run
- Your PC will restart multiple times before landing on the Windows 11 desktop
The ISO method is also the right choice if you are upgrading a machine without reliable internet access, since you can download the file once and use it on multiple devices.
How to troubleshoot common Windows upgrade problems
Upgrade failures follow predictable patterns. Knowing what causes them means you can fix most issues without starting over.
TPM and Secure Boot errors are the most frequent blockers. If setup reports that TPM 2.0 is not found, restart your PC, enter BIOS or UEFI (usually by pressing F2, F10, or Delete during boot), and look for a Security or Trusted Computing section. Enable TPM and set Secure Boot to Enabled. Save and exit, then retry the upgrade.
Driver errors cause a significant share of upgrade failures. Outdated graphics drivers, network adapter drivers, or storage controller drivers can stop the installer mid-process. Before upgrading, visit your PC manufacturer’s website and download the latest drivers for your model. Driver errors and TPM restrictions are among the top causes of upgrade failures, and updating drivers before you start removes a major variable.
Stuck update loops happen when Windows restarts repeatedly without completing the upgrade. If your PC has been restarting for more than 30 minutes with no progress bar movement, hold the power button to force a shutdown. Windows will roll back to your previous version automatically. This is by design. Once you are back on Windows 10, check the Windows Update troubleshooter under Settings > System > Troubleshoot.
경고: Never force a shutdown during the active installation phase when you see a progress percentage on screen. Only force shutdown if the system is stuck in a restart loop with no visible progress for an extended period.
SetupDiag is Microsoft’s official tool for diagnosing upgrade failures. Download it from Microsoft’s website, run it after a failed upgrade, and it generates a log file explaining exactly what went wrong. The output is technical but searchable. Copy the error code into a search engine and you will find targeted fixes within minutes.
전문가 팁: If your upgrade fails repeatedly and you cannot identify the cause, run an in-place repair upgrade. Mount the Windows 11 ISO, run setup.exe, choose “Keep personal files and apps,” and let it reinstall Windows system files over the existing installation. Repair upgrades fix underlying system issues without touching your data or apps.
One mistake to avoid: disabling your antivirus before upgrading. While some older guides recommend this, modern Windows Defender does not interfere with the upgrade process. Disabling third-party antivirus is sometimes necessary if it hooks deeply into system processes, but check the vendor’s documentation first.
What to do after the Windows upgrade is complete
Completing the installation is not the end of the process. The steps you take in the first hour after upgrade determine how stable and well-configured your system will be.
-
Run Windows Update immediately. Go to Settings > Windows Update and click Check for updates. Run it multiple times until no more updates appear. Windows 11 ships with a baseline build that often needs several rounds of patches to reach the current stable version.
-
Verify your Windows activation. Go to Settings > System > Activation. You should see “Windows is activated with a digital license.” If activation failed, your Windows 10 license may not have transferred correctly. Check that your original license was genuine and activated before the upgrade.
-
Check device drivers. Open Device Manager (right-click Start > Device Manager) and look for any devices with a yellow warning icon. These indicate missing or failed drivers. Visit your PC or component manufacturer’s website to download updated drivers for your specific hardware.
-
Review privacy settings. Windows 11 setup resets some privacy preferences. Go to Settings > Privacy & Security and review each category. Pay attention to diagnostic data, location, and app permissions.
-
Verify virtualization features if you are a developer or IT professional. Open Task Manager > Performance > CPU and confirm that Virtualization shows “Enabled.” If you use Hyper-V, WSL 2, or Docker, test each one after the upgrade. Post-upgrade steps including driver checks and activation verification are required to finalize the upgrade properly.
-
Test your most critical applications. Open your primary work tools and confirm they function correctly. If an app fails, check the vendor’s website for a Windows 11 compatible version before assuming the upgrade caused a deeper problem.
For IT professionals managing remote machines, a remote desktop setup guide can help you verify and reconfigure remote access settings that sometimes reset during the upgrade process.
주요 요점
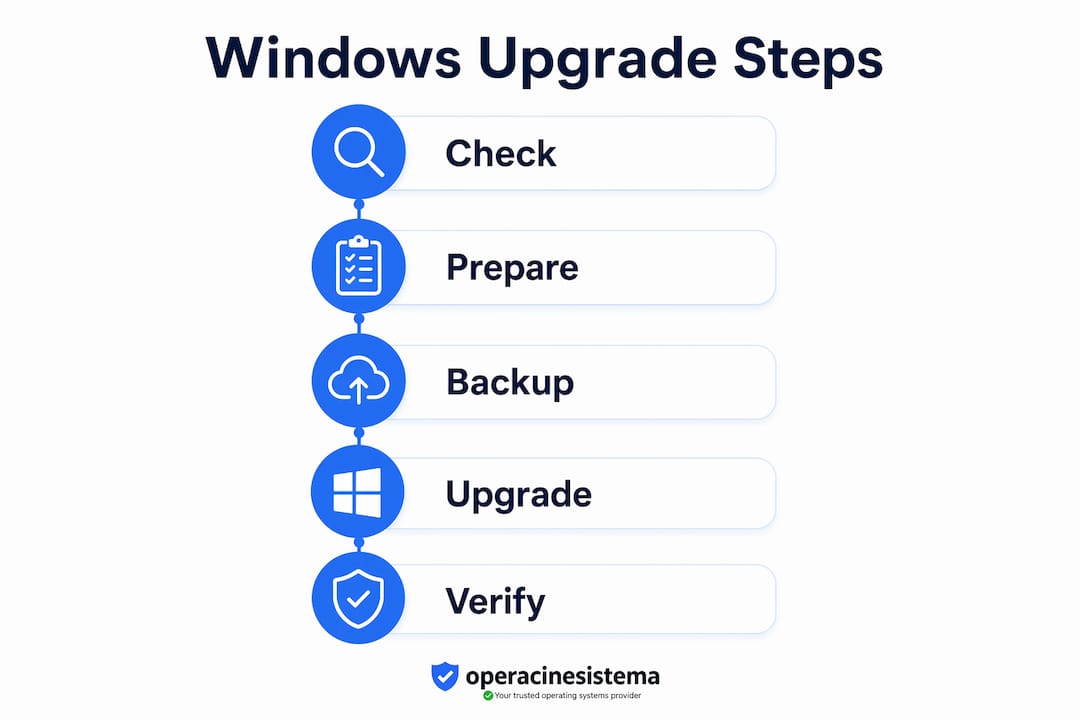
A successful Windows upgrade depends on three things done in order: verifying hardware compatibility, preparing your system and data, and choosing the right upgrade method for your situation.
| 포인트 | 세부 정보 |
|---|---|
| Check compatibility first | Run PC Health Check to confirm TPM 2.0, Secure Boot, and CPU support before downloading anything. |
| Back up before you start | Save personal files and create a system image so you can recover if the upgrade fails. |
| Choose the right method | Use Windows Update for simplicity, Installation Assistant for speed, or ISO for maximum control. |
| Launch setup from within Windows | Running setup.exe from a mounted ISO keeps your apps and settings; booting from USB triggers a clean install. |
| Finalize with updates and driver checks | Run Windows Update repeatedly and verify activation and drivers before considering the upgrade complete. |
Why preparation beats everything else in a Windows upgrade
작성자: Danielius
After working through dozens of Windows upgrades across different hardware generations, the pattern is always the same. The upgrades that go wrong are almost never caused by a bad installer or a Microsoft bug. They are caused by skipping preparation.
The users who spend 20 minutes on compatibility checks, backups, and driver updates before starting have a near-zero failure rate. The users who click “Install” the moment they see the option available spend hours recovering from problems that were entirely predictable.
The method you choose matters less than people think. Windows Update, the Installation Assistant, and the ISO approach all produce the same result when your system is ready. The ISO method feels more technical, but the extra control it gives you is only valuable if you use it correctly. Specifically: always launch setup.exe from within Windows. I have seen experienced users boot from USB expecting an upgrade and end up with a clean install and no data. That mistake is not recoverable without a backup.
One thing I would push back on compared to conventional advice: do not rush the post-upgrade phase. Most guides treat the first desktop appearance as the finish line. It is not. The system is not stable until you have run Windows Update to completion, confirmed activation, and tested your critical tools. Plan for 90 minutes of total time, not 30. That buffer is what separates a finished upgrade from a half-finished one that causes problems two weeks later.
If you are managing upgrades for others, document what you do. The Windows 11 upgrade process has enough variables that a written checklist saves real time on the second and third machine.
— 다니엘
Start your upgrade with a genuine Windows license
Every step in this guide assumes one thing: your Windows license is genuine and activated. A fake or blocked key does not transfer to Windows 11. It leaves you with an unactivated system, watermarked desktop, and no access to security updates.
Operacinesistema supplies original Windows 10 and Windows 11 Pro licenses, both as digital keys delivered instantly by email and as physical USB versions. OEM, Retail, and Volume license types are all available. Before you run the installer, make sure your license is real. Read the secure license buying guide to understand exactly what to look for and how to purchase safely. If you are unsure which license type fits your situation, the OEM vs. Retail vs. Volume breakdown explains the differences clearly. ✅
자주 묻는 질문
What is the easiest way to upgrade to Windows 11?
Windows Update is the simplest method. Go to Settings > Windows Update, check for updates, and install the Windows 11 feature update if it appears for your device.
Can I keep my files and apps during the upgrade?
Yes. Choose “Keep personal files and apps” during setup when using the Installation Assistant or ISO method. This option preserves your installed applications, personal files, and settings.
What happens if my PC fails the Windows 11 compatibility check?
Your PC likely has an unsupported CPU, disabled TPM 2.0, or Secure Boot turned off. Check your BIOS settings for TPM and Secure Boot options, and use PC Health Check to identify the specific blocker.
How long does a step by step Windows upgrade take?
Most upgrades take between 30 and 90 minutes depending on your hardware speed and internet connection. Plan for multiple restarts. Do not power off the machine during the process.
Will my Windows license still work after upgrading?
A genuine, activated Windows 10 license transfers automatically to Windows 11 as a digital license. If your original license was not genuine or was not activated, the upgrade will complete but Windows 11 will not activate.