How to install Windows 11 - step by step
This guide explains how to safely install Windows 11, either manually or using a USB stick.
Decided to upgrade your PC to the latest Microsoft operating system? How to install Windows 11 - a question asked by millions of consumers around the world. Although the process seems complicated, with the right information and preparation, you can successfully install the system yourself. This comprehensive guide will take you step-by-step through all the necessary steps, whether you are installing Windows 11 Pro USB memory, or upgrade from an older version.
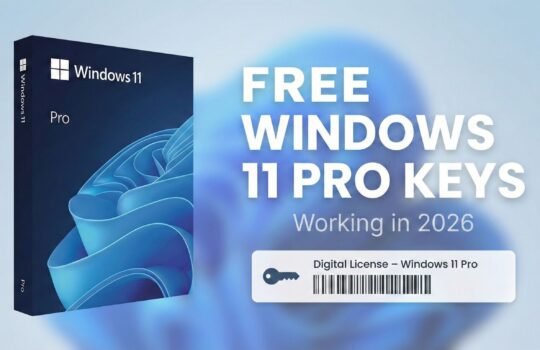
Windows 11 Pro
What you need to know before installing Windows 11
Before you start the installation process, you need to make sure that your computer meets all the requirements and that you understand which version of Windows 11 to choose. Preparing properly will ensure a smooth installation and avoid potential problems in the future.
System requirements (TPM, Secure Boot)
Windows 11 has stricter system requirements than previous versions, so before you start how to install Windows 11 the process, it is necessary to check the compatibility of the hardware. Microsoft has introduced these requirements to ensure a higher level of security and better system performance.
Minimum hardware requirements:
- Processor: 1 GHz or faster, 2 or more cores, compatible 64-bit processor
- RAM: 4 GB (for 64-bit system)
- Disk space: 64 GB or more
- UEFI firmware with Secure Boot support
- TPM version 2.0
- Graphics card: DirectX 12 compatible with WDDM 2.0 driver
- Display: 9" or larger, HD (720p)
TPM 2.0 (Trusted Platform Module) - A security chip that protects the encryption keys and ensures that the system has not been tampered with by malicious software. You can check the status of the TPM via Windows Security > Device Security > Security processor details. If the TPM is not active, you will need to enable it via BIOS/UEFI settings.
Secure Boot - a feature that ensures your computer only starts up with trusted software. This feature must be enabled in the UEFI settings. Most modern computers (manufactured after 2012) already have this feature, but it can be disabled. Before installing Windows 11 Pro OEM or other version, it is recommended to check and enable this feature.
Microsoft offers a special PC Health Check tool that automatically checks all requirements. Download it from the official Microsoft website and run it to get a detailed report on your PC's compatibility with Windows 11.
Windows 11 Pro
Differences between Home and Pro versions
Choosing between Windows 11 Home OEM and Windows 11 Pro OEM versions, it is important to understand the main differences. Both versions have the same basic functionality, but the Pro version offers additional features aimed at business users and advanced users.
Windows 11 Home functions:
- All the key features of Windows 11
- Microsoft Store access
- Windows Hello and biometric sign-in
- Snap Layouts for increased productivity
- Microsoft Teams integration
- Widgets and virtual desktops
- Support for up to 128 GB RAM
Windows 11 Pro additional features:
- BitLocker disk encryption
- Windows Information Protection
- Remote Desktop connection
- Hyper-V virtualisation
- Group Policy Editor for system management
- Domain/Azure Active Directory login
- Windows Sandbox for isolated environments
- Support for up to 2 TB RAM
- Deferral of updates for up to 35 days
The choice depends on your needs. If you use your computer at home for gaming, entertainment or simple work, Windows 11 Home OEM version will be quite sufficient. But if you work with sensitive information, need to connect to a corporate network or use virtualisation, Windows 11 Pro OEM would be a better choice. The price difference between the versions is not dramatic, so it is worth considering the Pro version for future needs.
Windows 11 Pro
Ways to install Windows 11
There are several ways, how to install Windows 11, and each has its own advantages. The choice depends on your situation: whether you have a running Windows system, want to do a clean install or just upgrade an existing version.
Using a USB memory stick
Installation via Windows 11 Pro USB memory is the most popular and reliable method, especially when you want to perform a clean installation of your system. This method allows you to install Windows 11 even on computers without an operating system.
What you will need:
- USB memory stick (minimum 8 GB)
- Windows 11 ISO file
- Rufus or other USB development tool
Preparing a USB stick:
- Download the Windows 11 ISO file from the official Microsoft website
- Download and run the Rufus app (free)
- Connect a USB stick (all data will be deleted!)
- In Rufus, select:
- Device: your USB stick
- Boot selection: select the downloaded ISO file
- Partition scheme: GPT (for UEFI computers)
- Target system: UEFI (non-CSM)
- File system: NTFS
- Click START and wait for the process to finish (10-15 min)
Deployment process:
- Switch off your computer and connect a prepared USB stick
- Switch on the computer and immediately press the Boot menu key (F12, F8, ESC - depending on the manufacturer)
- Select a USB stick from the boot list
- The installation of Windows 11 will begin:
- Choose your language, time and keyboard
- Click „Install now”
- Enter the product key or select „I don't have a product key”
- Choose Windows 11 Pro OEM or Home version
- Accept the terms of the licence
- Select „Custom: Install Windows only (advanced)”
- Select a disk/partition for installation
- Wait for the system to be installed (20-40 minutes)
- After rebooting, follow the Initial Configuration Wizard
Windows 11 Pro
Using the Media Creation Tool„
Microsoft Media Creation Tool - the official tool that simplifies the whole process, how to install Windows 11. This tool automatically downloads the latest version of Windows 11 and prepares the installation media.
Using the Media Creation Tool:
- Download the tool from microsoft.com/software-download/windows11
- Run „MediaCreationToolW11.exe” as administrator
- Accept the terms of the licence
- Choose one of the options:
- „Upgrade this PC now” - upgrades your current system
- „Create installation media” - creates a USB/DVD installation media
Creating the installation media:
- Select language, version (Home/Windows 11 Pro OEM) and architecture
- Select the media type:
- USB flash drive (recommended)
- ISO file (for later burning to DVD or USB)
- Select a USB stick from the list
- The tool will automatically download Windows 11 and prepare the memory stick
- The process will take 20-60 minutes (depending on internet speed)
This method is particularly handy because it automatically selects the correct version of Windows 11 and ensures that you are installing the latest updates. After the USB preparation, the installation process is identical to the method described above.
Upgrading from Windows 10
If you're currently running Windows 10 and your PC is eligible, you can upgrade directly to Windows 11, keeping all your apps and files. This is the easiest way how to install Windows 11 for existing Windows 10 users.
Update via Windows Update:
- Check if your computer is compatible (PC Health Check)
- Go to Settings > Update & Security > Windows Update
- If you see „Windows 11 upgrade is ready”, click „Download and install”
- Agree to the terms and conditions and start downloading
- The system will download files in the background (3-5 GB)
- When ready, you will receive a reboot notification
- Reboot your computer and wait for the installation to complete (30-90 minutes)
Upgrade via Installation Assistant:
- Download the Windows 11 Installation Assistant
- Run the tool as administrator
- The tool will check compatibility
- Click „Accept and install”
- The app will download and prepare Windows 11
- You can continue working while the system prepares in the background
- When ready, select the reloading time
Important tips for upgrading:
- Back up important files
- Make sure you have at least 20 GB of free space
- Disconnect external devices (except mouse/keyboard)
- Temporarily disable your antivirus software
- Close all applications before starting
- Make sure your computer is connected to power
After the update, you'll have 10 days to go back to Windows 10 if you don't like anything. All files, apps and settings will be preserved, but it's recommended to check for driver updates after installation.
Windows 11 Pro
Activation and licence
After installing Windows 11, the system must be activated to use all the features. Without activation, you won't be able to change your personalisation settings and you'll see a watermark at the bottom right of the screen.
Activation methods:
Automatic activation: If you've upgraded from a licensed Windows 10, the system will activate automatically online. You can check in Settings > System > Activation.
Using the product key:
- Go to Settings > System > Activation
- Click „Change product key”
- Enter a 25-character key (xxxxx-xxxxxxx-xxxxx-xxxxx-xxxxx-xxxxx)
- The system will connect to Microsoft servers and activate
Digital licence: If Windows 10/11 was previously activated on that computer, the system may activate automatically when you connect to the internet. Microsoft stores your hardware ID with your licence.
OEM vs Retail licences:
- Windows 11 Home OEM and Windows 11 Pro OEM licences are attached to specific hardware
- OEM licences are the cheapest, but you can't transfer them to another computer
- Retail licences are more expensive, but can be transferred when changing computers
- OEM licences are ideal for new computers or a single device
After installation, get a Windows 11 Pro licence at the best price. The Pro version provides additional features and long-term support for your business or personal needs.
Frequently asked questions
Can I install Windows 11 without a product key?
Yes, you can install and use Windows 11 without a product key, but with some limitations. During installation, when the system prompts you for a product key, you can select „I don't have a product key” to continue with the installation. The system will be installed fully functional but not activated.
Deactivated Windows 11 restrictions:
- You won't be able to change your desktop background via Settings
- Locked personalisation section (themes, colours, lock screen)
- Watermark at the bottom of the screen: „Activate Windows”
- Periodic reminders to activate the system
- Some Windows updates will not be available
When to use without activation:
- Testing the system before buying a licence
- Temporarily, until you purchase a product key
- For testing virtual machines
- For learning purposes
It's important to know that Microsoft allows you to use deactivated Windows 11 indefinitely, but Windows 11 Pro USB Installation with a licence ensures full functionality and legal use. We recommend that you purchase Windows 11 Home OEM or the Pro version, once you're satisfied that the system meets your needs.
How much space is needed to install Windows 11?
The official Microsoft requirement for Windows 11 is 64 GB free space disk. In practice, however, more space needs to be planned for comfortable use.
Real local needs:
- Windows 11 itself: ~20-25 GB
- System files and pagefiles: ~8-16 GB (depending on RAM)
- Windows updates: ~10 GB (kept as a backup)
- Recommended minimum capacity: 128 GB SSD
- Optimal capacity for operation: 256 GB or more
Local optimisation tips:
- After installation, run Disk Cleanup to clean up temporary files
- Disable hibernation if you don't use it (save ~6-8 GB)
- Reduce the size of your bin
- Move User folders to another drive
- Use Storage Sense for automatic cleaning
SSD vs HDD: Although Windows 11 will work with HDD, we strongly recommend SSDs for the main system:
- 5-10 times faster system start-up
- Instant opening of applications
- Quiet operation and reduced energy consumption
- Longer service life
By installing Windows 11 Pro OEM or Home version, plan for at least 20-30% of free disk space for the normal operation of the system. Windows needs free space for temporary files, updates and virtual memory.