Secure USB Installation Guide for Individuals & SMBs
TL;DR:
- A secure USB installation involves encrypting, authorizing, and safely handling the device to prevent data theft and malware. Using tools like BitLocker or VeraCrypt and following best practices for backups, strong passphrases, and proper dismounting ensures maximum protection. Ongoing habits and policies are essential to maintain USB security beyond the initial setup.
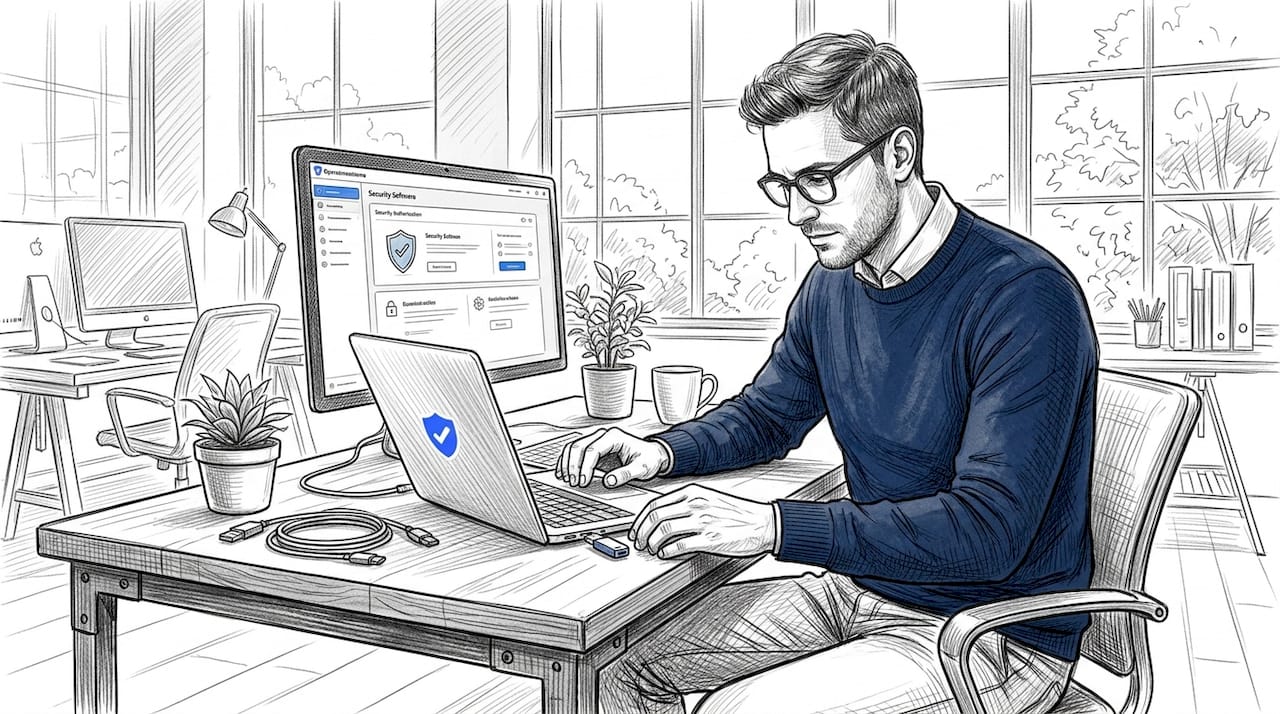
A secure USB installation is defined as the process of encrypting, access-controlling, and safely handling a USB drive before, during, and after software installation to prevent data theft, malware injection, and unauthorized access. Most people skip this step entirely. That is a serious mistake. Tools like BitLocker and VeraCrypt exist specifically to close the gap between convenience and real protection. Whether you are a home user installing Windows on a new machine or a small business owner managing multiple workstations, this secure USB installation guide covers everything you need to do it right.
What does a secure USB installation guide actually cover?
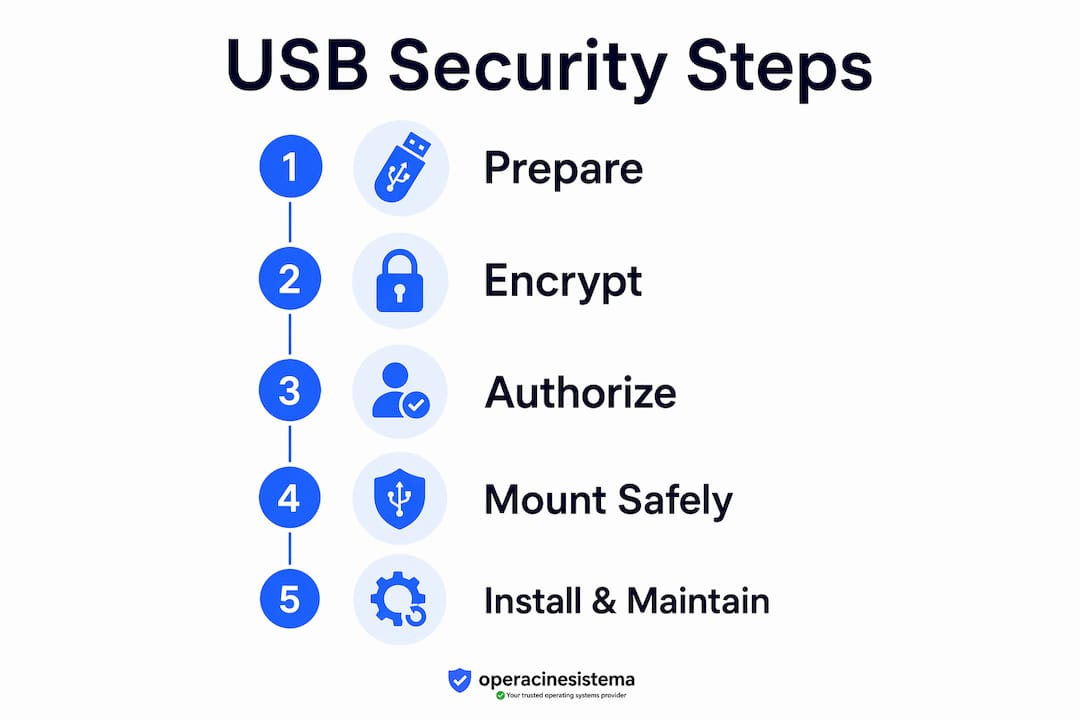
A secure USB installation combines three layers of protection: encryption, device authorization, and safe handling practices. Miss any one of these and the other two lose much of their value.
Encryption locks the data on your USB drive so that only someone with the correct password or recovery key can read it. BitLocker provides AES encryption on Windows Pro, Enterprise, and Education editions, covering the entire drive behind a password. VeraCrypt is the cross-platform alternative, using AES with SHA-512 hashing for strong, hardware-accelerated protection on Windows, macOS, and Linux.
Device authorization controls which USB devices your computer will even recognize. On Linux, USBGuard enforces a deny-by-default policy that blocks any unrecognized USB device from mounting automatically. This matters because physical USB ports are one of the most common malware entry points in both home and business environments.
Safe handling covers the habits that protect your data after encryption is set up: proper dismounting, secure password storage, and avoiding untrusted computers. All three layers work together. This guide walks you through each one.
What tools and prep do you need before you start?
Getting your setup right before you touch any encryption tool saves you from data loss and failed installations later. Here is what you need.
Hardware requirements
- ✅ A USB drive with at least 8 GB of storage (16 GB or more recommended for OS installations)
- ✅ A USB 3.0 port for acceptable read/write speeds during encryption
- ✅ A second storage location (external drive or cloud) for backups before you encrypt
Software requirements
| Tool | Platform | Use Case |
|---|---|---|
| BitLocker | Windows Pro/Enterprise/Education | Full USB drive encryption |
| VeraCrypt | Windows, macOS, Linux | Cross-platform encrypted volumes |
| USBGuard | Linux | Device authorization and access control |
| Windows Media Creation Tool | Windows | Creating bootable USB installers |
** Important:** BitLocker is not available on Windows Home editions. If you are running Windows 10 or 11 Home, you will need to upgrade to Pro or use VeraCrypt instead. Operacinesistema sells genuine Windows 10 Pro licenses that unlock BitLocker and other enterprise-grade security features.
Before you begin: a quick checklist
- Back up all existing data on the USB drive. Encryption formats the drive.
- Download VeraCrypt or confirm BitLocker availability in your Windows edition.
- Choose a strong passphrase. Passphrases of at least 20 characters significantly raise encryption security while staying memorable.
- Confirm your USB drive is compatible with your target machine’s Secure Boot settings if you are creating a bootable installer.
- Have your Windows license key ready if you are installing an operating system.
Pro Tip: Write your passphrase on paper and store it in a physically secure location before you start. Losing it after encryption means losing your data permanently.
How do you encrypt a USB drive and install software securely?
This is the core of any USB security setup. Follow these steps in order. Skipping steps, especially the backup step, is the number one cause of data loss during USB encryption.
Step 1: back up and format your USB drive
- Copy all existing files from the USB drive to a safe location.
- Open File Explorer (Windows) or Disk Utility (macOS) and format the drive.
- Choose exFAT if you need cross-platform compatibility (Windows, macOS, Linux). Choose NTFS if you will only use the drive on Windows machines and want better large-file support.
- Label the drive clearly so you recognize it later.
Step 2: encrypt with BitLocker on windows pro
- Insert your USB drive and open File Explorer.
- Right-click the drive and select “Turn on BitLocker.”
- Choose “Use a password to unlock the drive” and enter a strong passphrase.
- Save your recovery key. Microsoft recommends saving it to your Microsoft account, a file, or printing it. Do all three if the data is critical.
- Select “Encrypt entire drive” for maximum protection.
- Click “Start encrypting.” The process takes several minutes depending on drive size.
Once complete, the drive will prompt for your password every time it is connected. Software encryption gives you direct control over your keys, which is a compliance advantage that hardware-only encrypted drives cannot match.
Step 3: encrypt with VeraCrypt (cross-platform option)
VeraCrypt is the right choice if you use multiple operating systems or need an open-source solution. VeraCrypt’s AES with SHA-512 hash provides strong hardware-accelerated security across all platforms.
- Download VeraCrypt from the official site at veracrypt.fr. Never use third-party download sources.
- Install VeraCrypt and launch it.
- Click “Create Volume” and select “Encrypt a non-system partition/drive.”
- Choose “Standard VeraCrypt volume” for most use cases.
- Select your USB drive from the device list.
- Choose AES as the encryption algorithm and SHA-512 as the hash.
- Enter a passphrase of at least 20 characters. Mix words, numbers, and symbols.
- Format the volume. VeraCrypt will wipe and encrypt the drive.
- Immediately back up the volume header using Tools > Backup Volume Header. Store this backup separately from the drive.
** Critical:** Backing up the volume header protects you from total data loss if the header becomes corrupted. Most guides skip this step. Do not skip it.
Step 4: mount, use, and dismount safely
| Action | BitLocker | VeraCrypt |
|---|---|---|
| Mount drive | Auto-prompts on connection | Select drive in VeraCrypt, click Mount |
| Access files | Normal File Explorer access | Appears as a virtual drive letter |
| Dismount | Use “Safely Remove Hardware” | Click Dismount in VeraCrypt |
| Auto-dismount | Not built-in | Set in Settings > Preferences |
Auto-dismount in VeraCrypt automatically locks the encrypted volume when your computer goes idle or you log out. This prevents data exposure if you walk away from your machine. Enable it in VeraCrypt’s Preferences menu under the “Auto-Dismount” tab.
Pro Tip: Always use the “Dismount All” button in VeraCrypt before physically removing the drive. Pulling the drive while mounted can corrupt the volume header and lock you out permanently.
Step 5: install software from the encrypted USB
Once your drive is encrypted and mounted, run your installer normally. The encryption layer is transparent to the installer. For Windows OS installations, the process is slightly different: the bootable USB must be readable before encryption, so you create the bootable drive first, then encrypt any secondary data partition if needed.
How do you maintain USB security after installation?
Encryption is not a one-time setup. Ongoing habits determine whether your USB security setup holds up over time.
- ️ Scan before every use. Run a malware scan on the USB drive using Windows Defender or Malwarebytes before opening any files, especially after using the drive on a computer you do not own.
- ️ Use deny-by-default policies. USBGuard on Linux logs unauthorized access attempts instead of auto-mounting devices. This blocks BadUSB attacks, where a malicious device pretends to be a keyboard and injects commands. Windows users can configure similar restrictions through Group Policy.
- ️ Keep recovery keys backed up. Store BitLocker recovery keys in at least two separate locations. One should be offline (printed or written). One should be in a secure cloud account.
- ️ Update your encryption software. VeraCrypt releases security updates regularly. An outdated version can have known vulnerabilities.
- ️ Avoid untrusted computers. Plugging an encrypted drive into a compromised machine can expose your data while the volume is mounted. The encryption protects data at rest, not data in use.
- ️ Consider hardware-encrypted drives for high-sensitivity data. Drives like the Kingston IronKey series add a physical PIN pad, removing the password from the software layer entirely.
Pro Tip: For small businesses, create a written USB policy. Define which drives are approved, who can use them, and what data can be stored on them. A written policy is the first step toward compliance with standards like ISO 27001 or HIPAA.
Pair your USB protection guide with a broader security best practices checklist to cover the full attack surface, not just removable storage.
What are the most common USB encryption mistakes?
USB security failures often stem from usability gaps rather than technology flaws. The tools work. People make the mistakes.
Here are the most common ones and how to fix them:
-
Weak passwords. Using a short password like “USB2024!” gives attackers a fast path through brute-force attacks. Use a passphrase of 20 or more characters instead.
-
No volume header backup. In VeraCrypt, a corrupted header means total data loss. Back up the header immediately after creating the volume, and store the backup file somewhere other than the USB drive itself.
-
Skipping the dismount step. Pulling the drive without dismounting can corrupt the encrypted volume. Always use “Safely Remove Hardware” on Windows or the Dismount button in VeraCrypt.
-
Wrong filesystem choice. Using NTFS on a drive you plan to use on macOS will cause read-only access or no access at all. Use exFAT for cross-platform compatibility.
-
Not verifying Secure Boot compatibility. If you are creating a bootable Windows installer, confirm that your BIOS/UEFI settings allow the USB to boot. Secure Boot may block unsigned bootloaders.
-
Downloading tools from unofficial sources. Always download BitLocker through Windows settings and VeraCrypt from veracrypt.fr. Tampered versions of encryption software exist and can silently expose your keys.
Warning: If you lose both your passphrase and your VeraCrypt volume header backup, your data is unrecoverable. No tool, no support team, and no amount of money will get it back. Treat your recovery materials like a physical key to a safe.
If you encounter a BitLocker error like “BitLocker cannot encrypt this drive,” the most common causes are an incompatible TPM (Trusted Platform Module) configuration or a drive formatted with an unsupported filesystem. Check your BIOS settings and reformat the drive to NTFS before trying again.
Key takeaways
Securing a USB drive requires encryption, device authorization, and consistent safe-handling habits working together — no single step is sufficient on its own.
| Point | Details |
|---|---|
| Choose the right encryption tool | Use BitLocker on Windows Pro or VeraCrypt for cross-platform encrypted USB installations. |
| Back up before and after encryption | Copy data before encrypting and back up the VeraCrypt volume header immediately after creation. |
| Use strong passphrases | Passphrases of at least 20 characters provide strong protection and are easier to remember than complex short passwords. |
| Enable auto-dismount | Configure VeraCrypt’s auto-dismount feature to prevent data exposure when your machine is idle. |
| Maintain ongoing habits | Scan drives before use, avoid untrusted computers, and keep recovery keys stored in two separate locations. |
Why most USB security guides miss the real problem
By Danielius
After years of working with individuals and small business owners on software licensing and OS installations, I have noticed a consistent pattern. People focus almost entirely on the encryption step and then treat the job as done. They set up BitLocker or VeraCrypt, feel secure, and never think about it again. That is the “set and forget” mentality, and it is where most USB security actually breaks down.
The real risk is not that encryption tools fail. They rarely do. The risk is that people forget their recovery keys, skip the dismount step when they are in a hurry, or plug their encrypted drive into a hotel lobby computer without thinking. Encryption protects data at rest. It does not protect data while it is mounted and actively in use on a compromised machine.
For small businesses specifically, the gap between having encryption and having a USB security policy is enormous. One employee using a personal USB drive on a work machine can undo everything a well-configured BitLocker setup protects. The deny-by-default approach with USBGuard or Windows Group Policy is not optional for businesses. It is the difference between a security posture and a security theater.
My honest recommendation: treat your USB encryption passphrase and recovery key like a physical house key. You would not leave your house key on a sticky note on your front door. Do not store your BitLocker recovery key in an unprotected text file on the same machine you are trying to protect.
The tools are good. The habits are what need work.
— Danielius
Get your windows license ready for secure USB installation
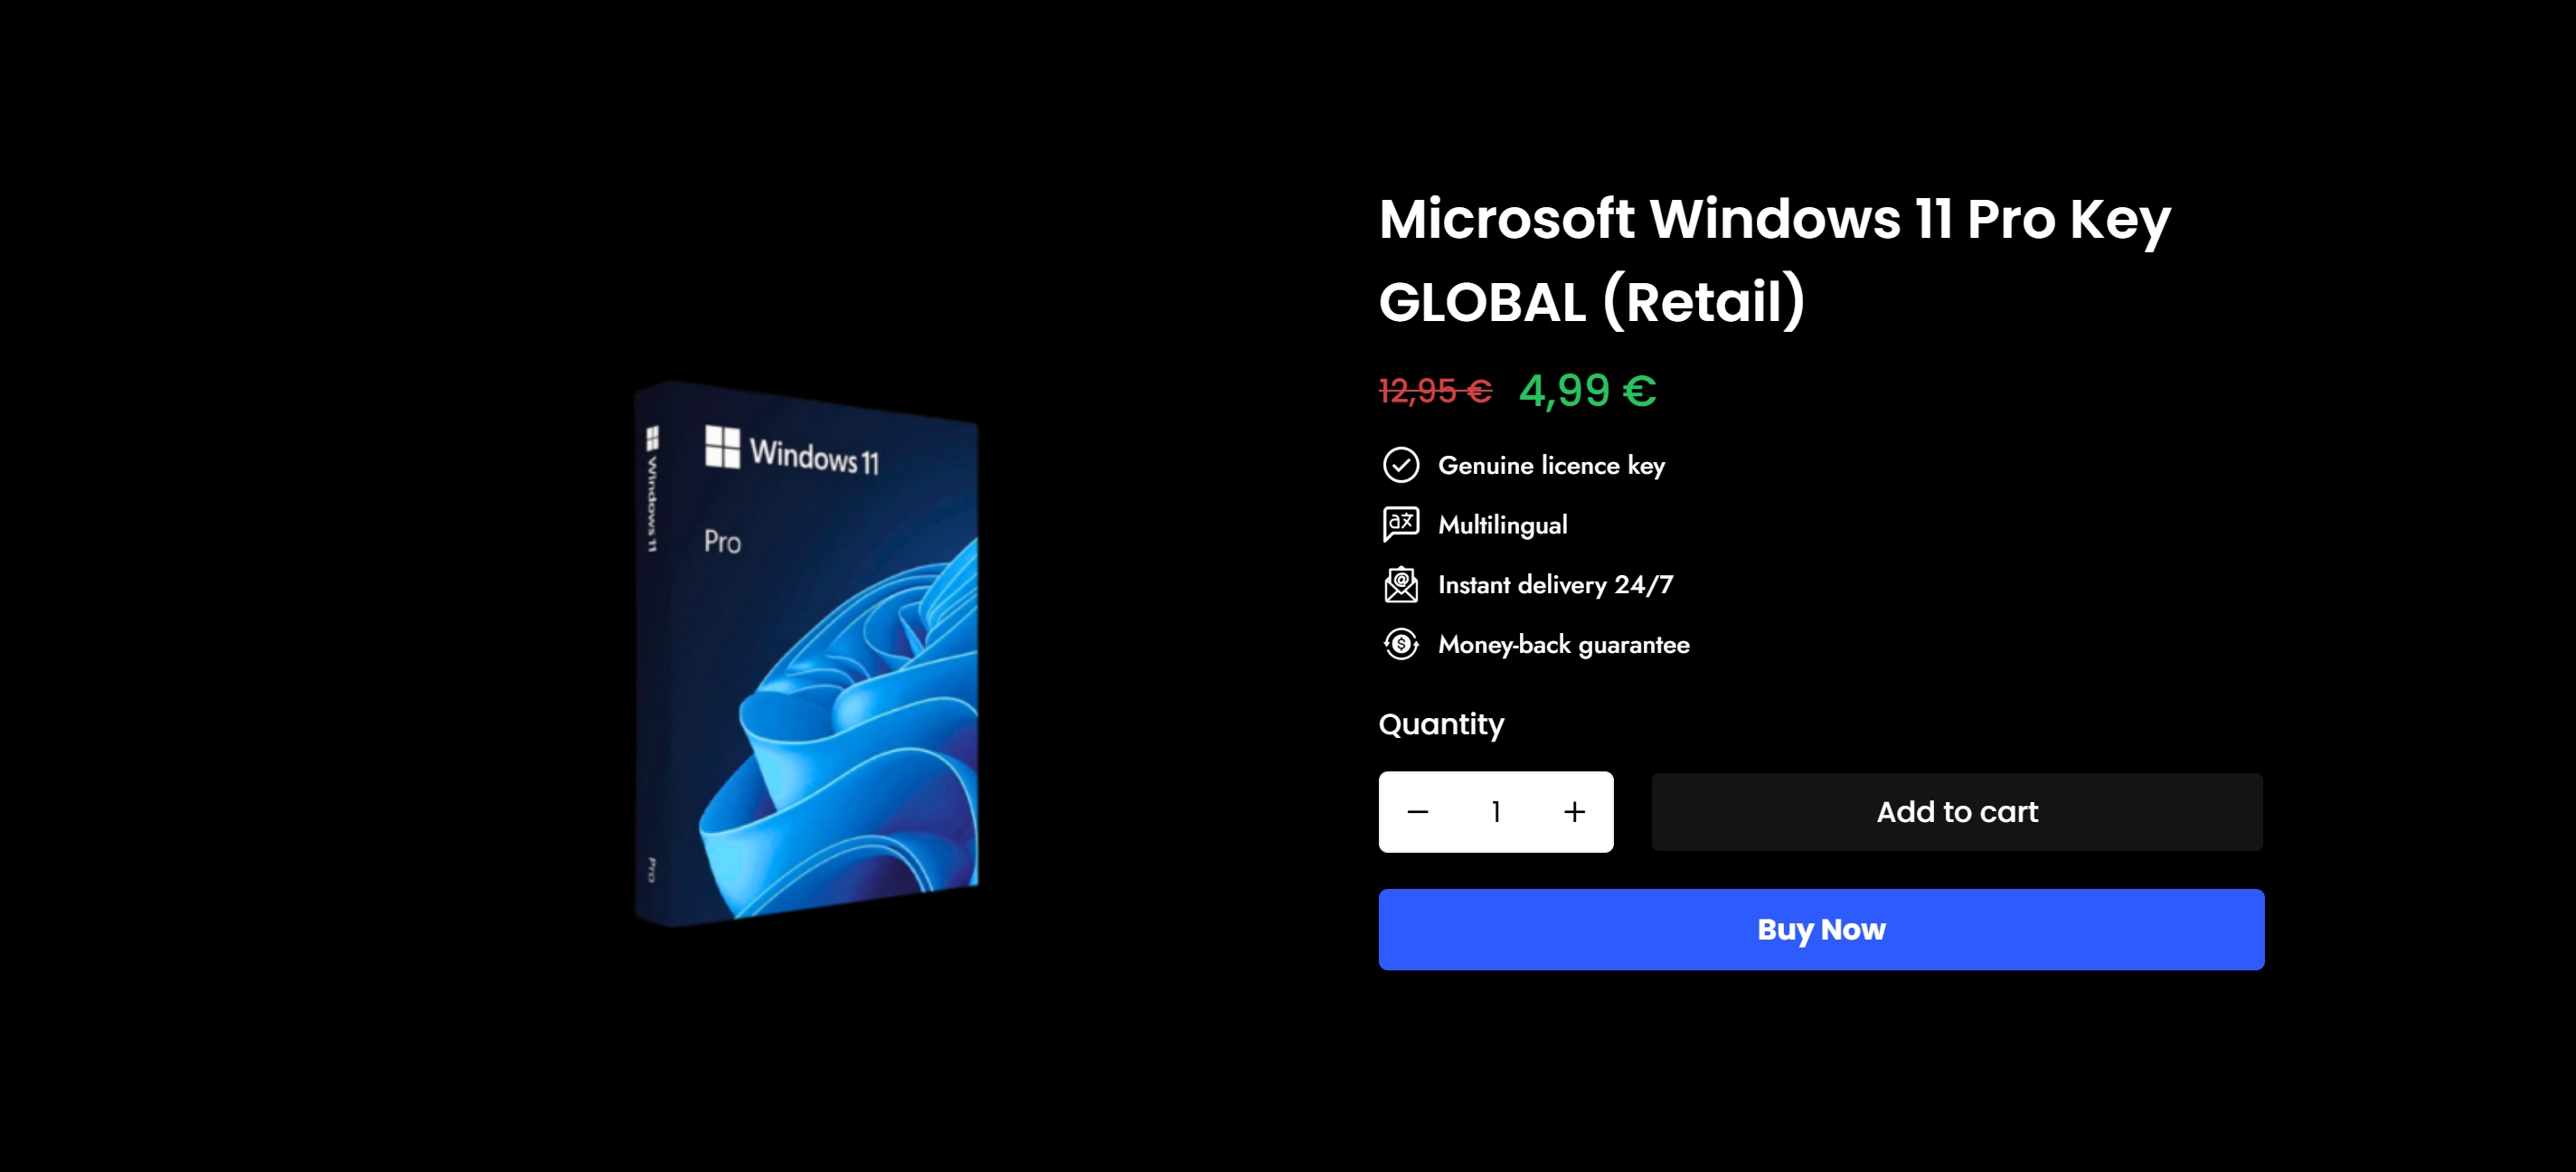
Before you encrypt and install, you need a genuine Windows license. A fake or blocked key will stop your installation cold, waste your time, and leave your machine unactivated and vulnerable. Operacinesistema provides official Windows 10 and Windows 11 Pro licenses, including physical USB versions, with full activation support and a 100% warranty.
Whether you need a single license for a home PC or multiple keys for a small business rollout, start with the Windows license checklist to confirm you are buying the right type. For a full walkthrough of the purchase and activation process, the secure Windows license buying guide covers every step. Get the right license first. Then secure your USB. Do it in that order.
FAQ
What is the difference between BitLocker and VeraCrypt?
BitLocker is built into Windows Pro, Enterprise, and Education editions and encrypts entire drives with minimal setup. VeraCrypt is a free, open-source tool that works across Windows, macOS, and Linux, offering more flexibility but requiring more manual configuration.
Can i use BitLocker on windows 10 home?
No. BitLocker is not available on Windows Home editions. You need Windows 10 or 11 Pro, Enterprise, or Education to use full USB drive encryption with BitLocker. VeraCrypt is the free alternative for Home users.
What filesystem should i use for an encrypted USB drive?
Use exFAT if you need the drive to work on both Windows and macOS. Use NTFS if the drive will only be used on Windows machines. Using NTFS on a Mac will result in read-only access without additional software.
How do i recover a VeraCrypt volume if i forget my password?
VeraCrypt volumes cannot be recovered without the correct passphrase. If you also have a volume header backup, you can restore the header and attempt access with any previously used passphrase. Without both, the data is permanently inaccessible.
Is a hardware-encrypted USB drive better than software encryption?
Hardware-encrypted drives add a physical layer of protection but remove your direct control over the encryption keys. Software encryption gives you key sovereignty and better compliance flexibility. For most individuals and small businesses, software encryption with BitLocker or VeraCrypt is the more practical and auditable choice.